Administrator Guide
Getting Started as an Admin
Follow these steps to set up your CARUSO platform and get your team up and running quickly.
1
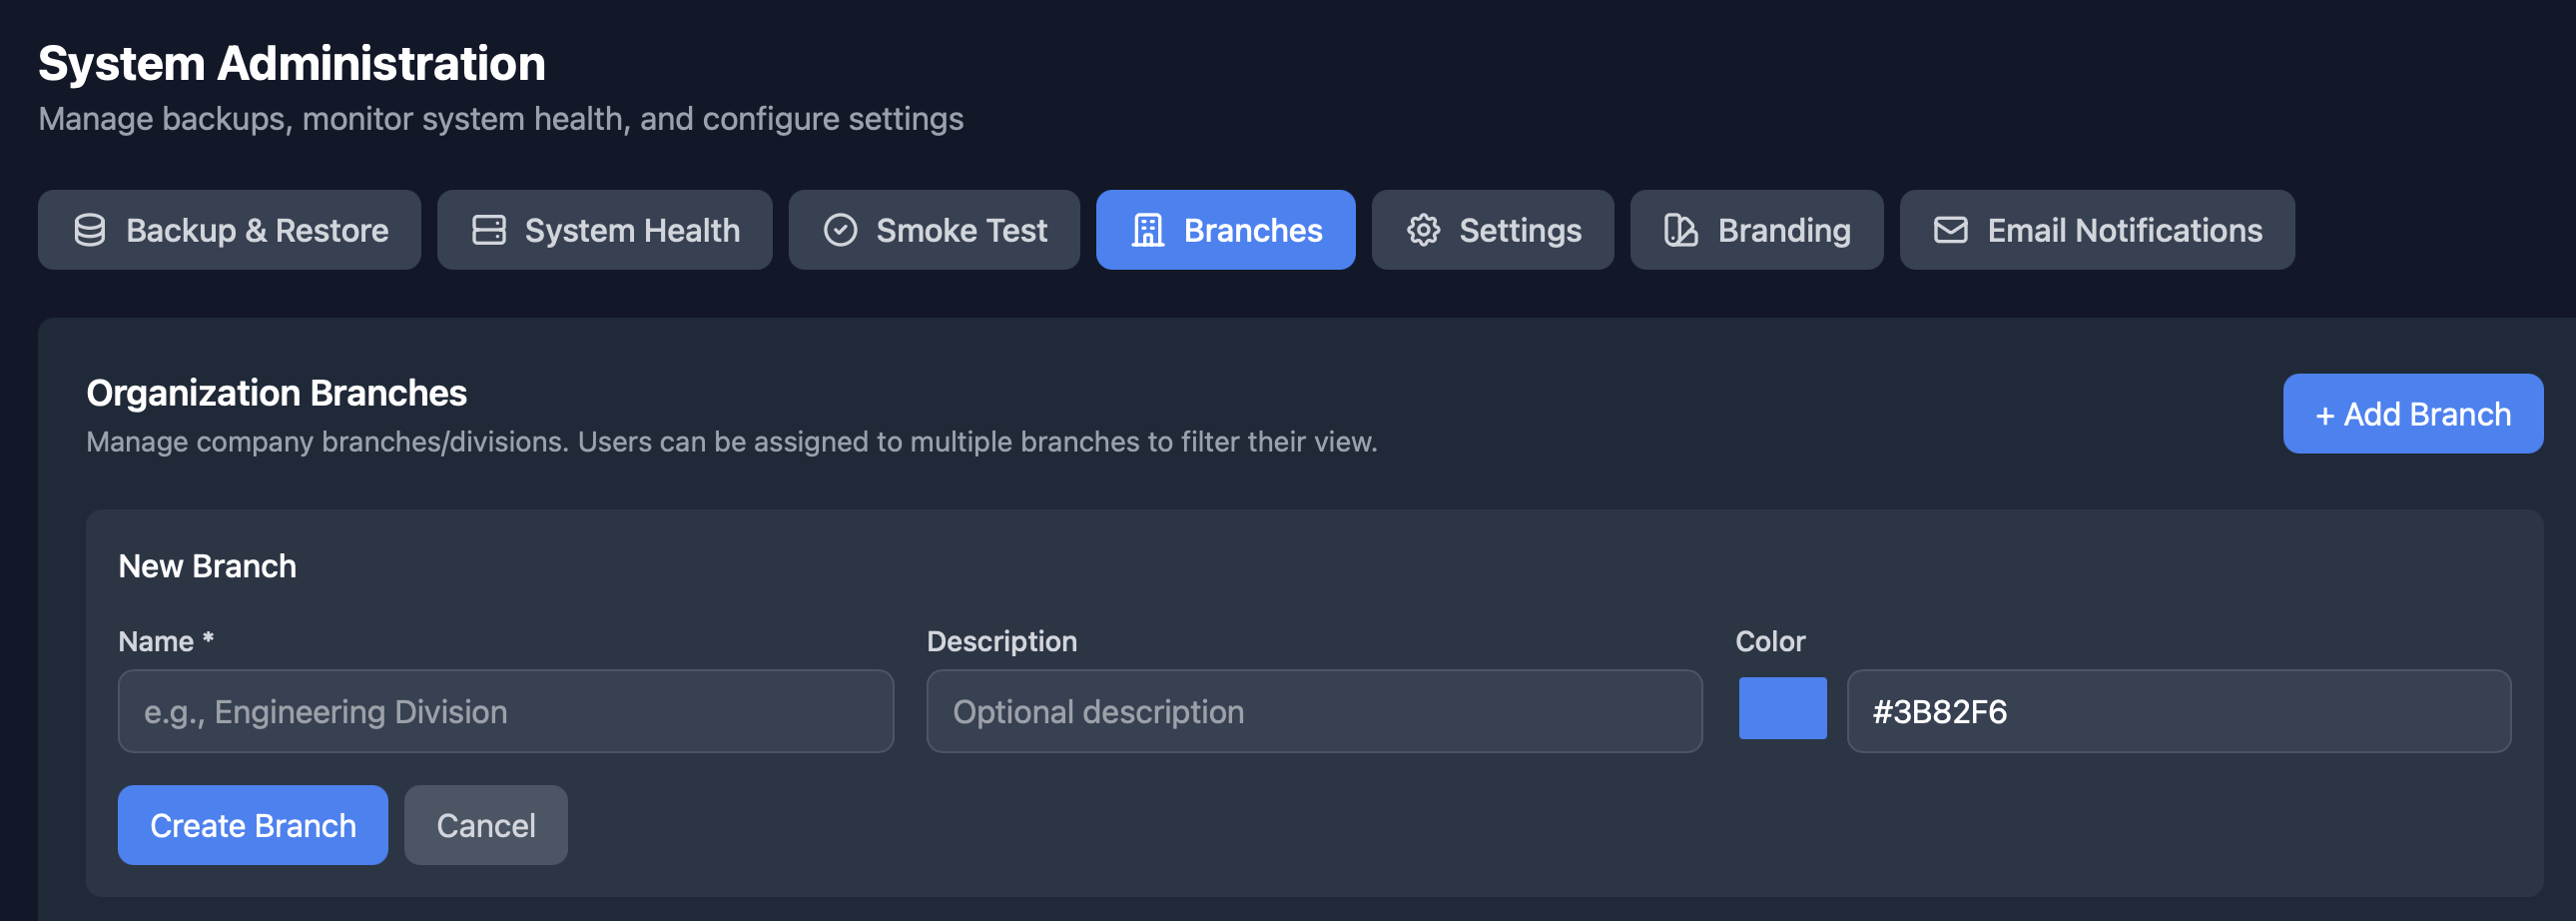
Set Up Your Branches
System Admin → Branches
Branches represent the different sections or divisions of your organization where programs and projects will be organized.
What You'll Configure
- Create branches for each department, division, or business unit
- Programs and projects will be assigned to specific branches
- Users can be given access to specific branches based on their role
- Branch structure helps organize reporting and resource allocation
2
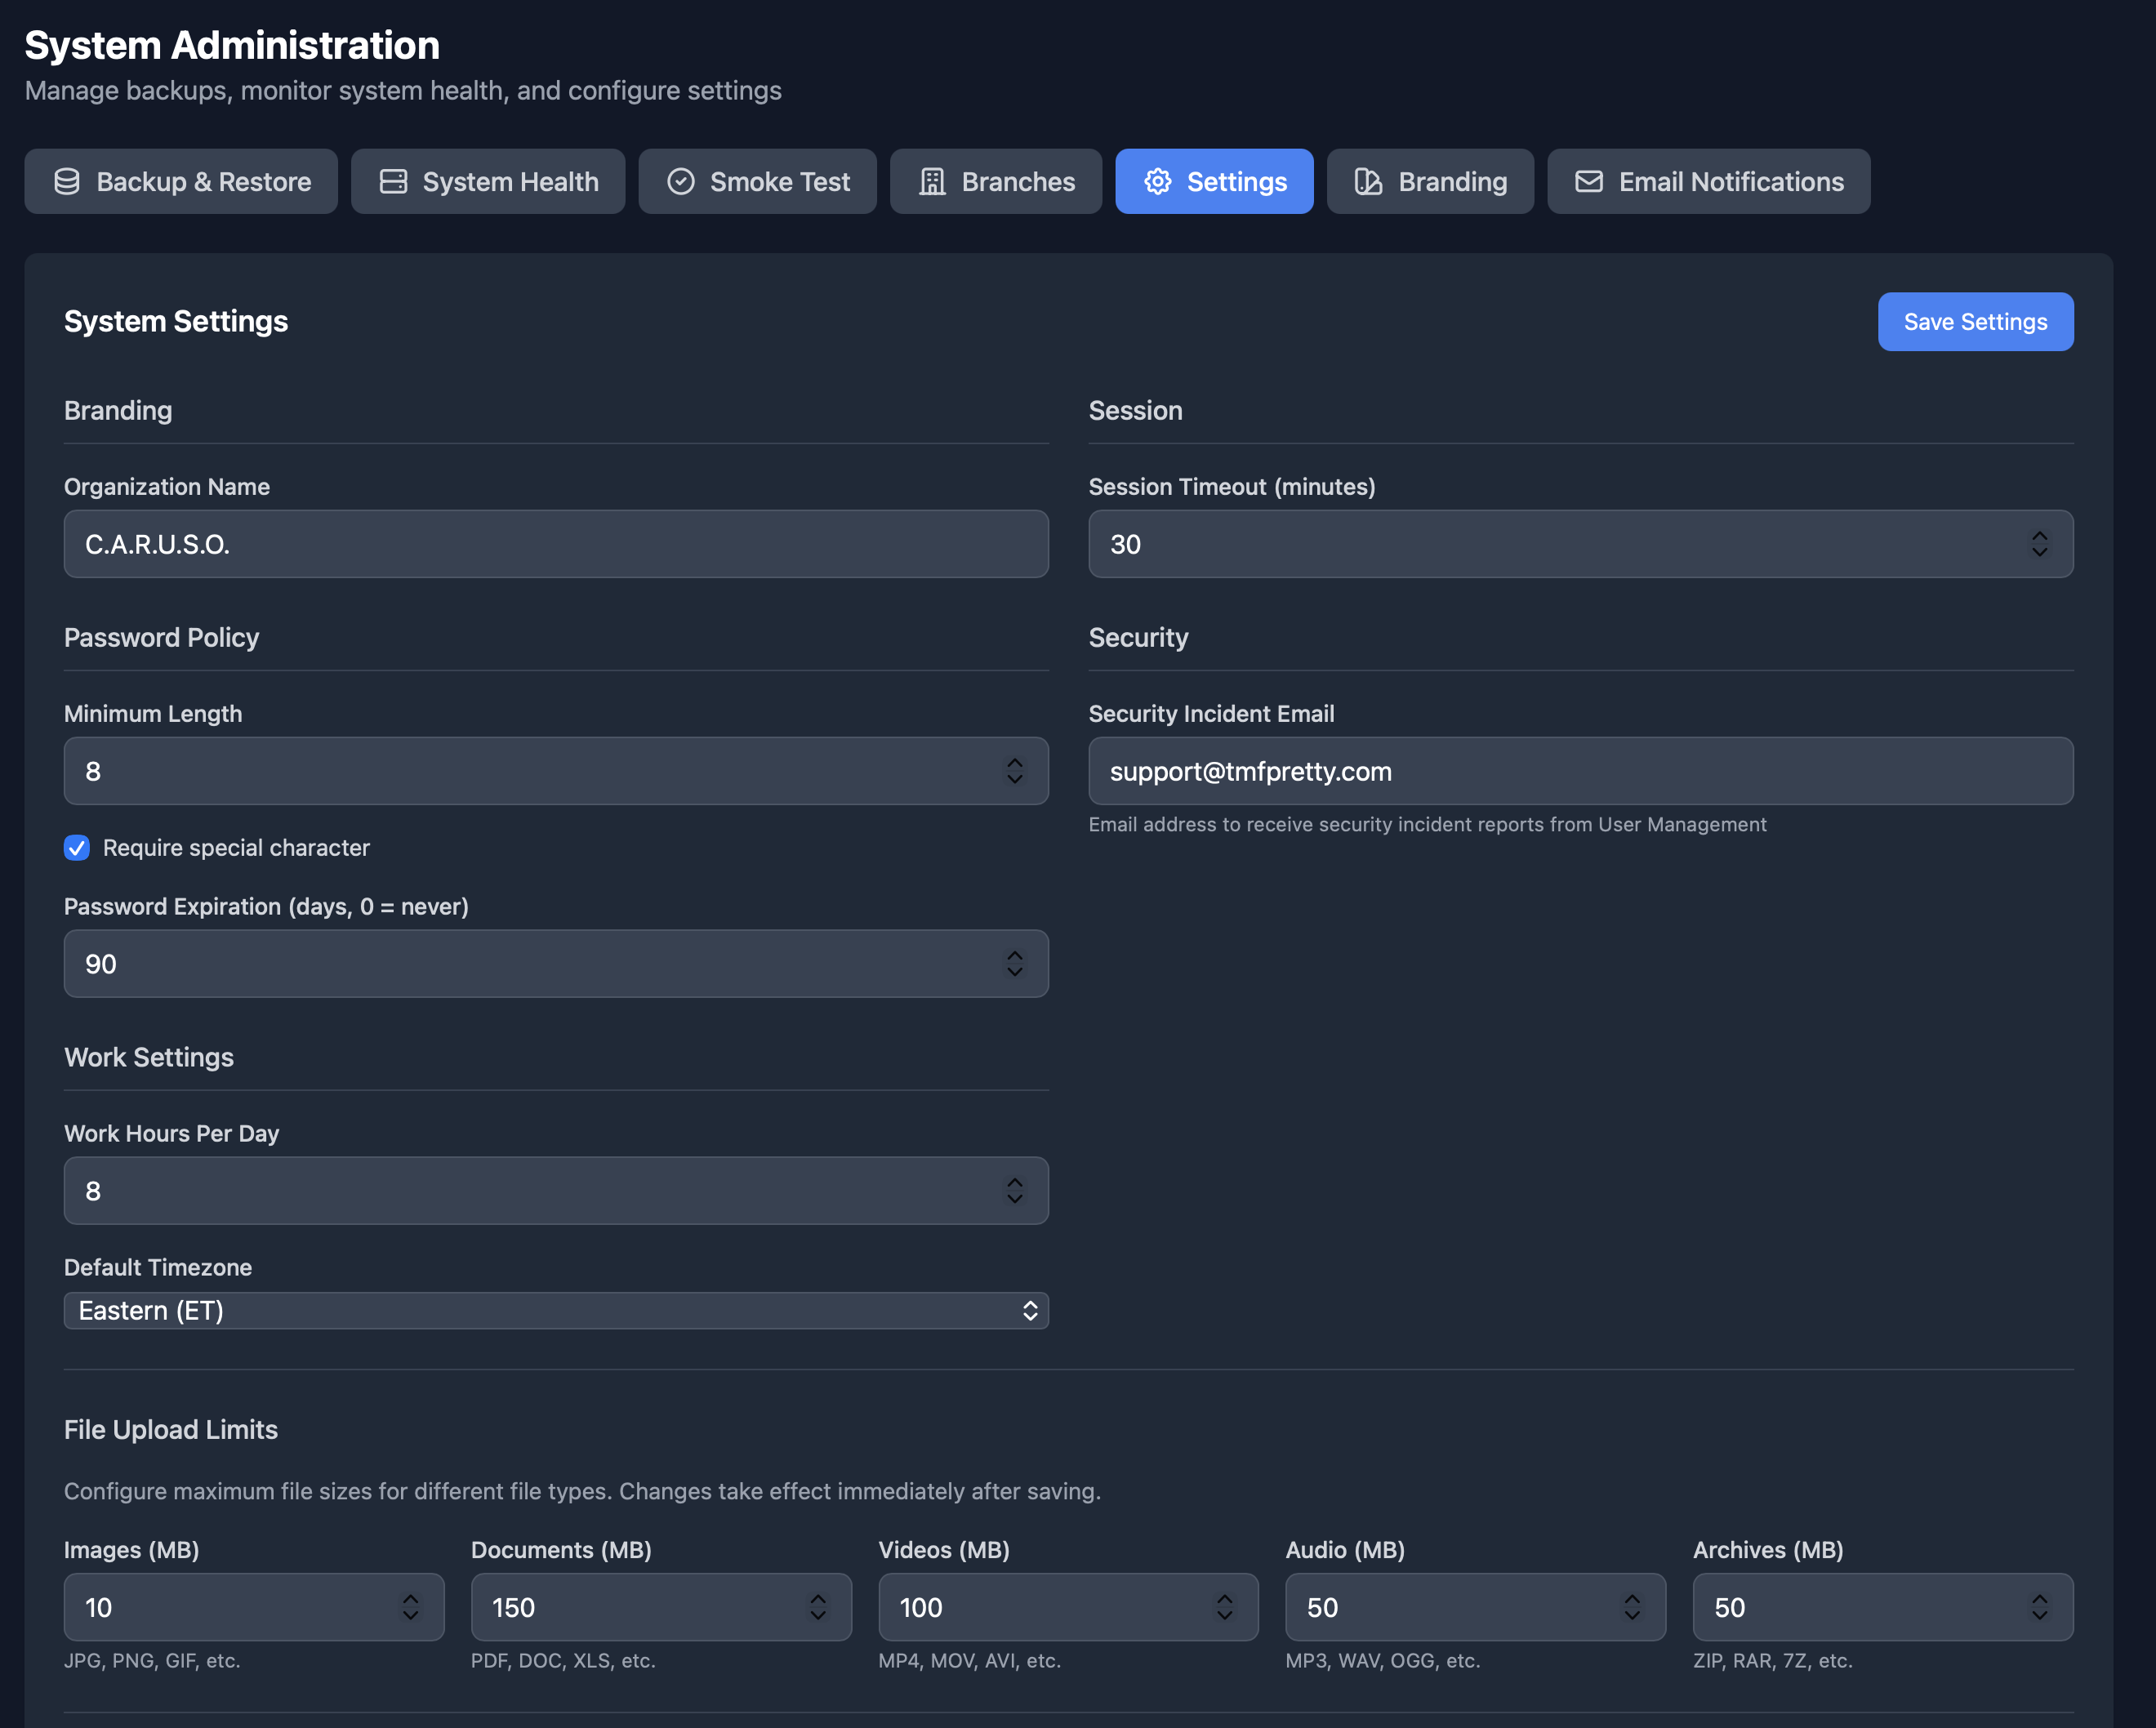
Configure System Settings
System Admin → Settings
Configure your organization's core settings including name, file limits, and security notifications.
What You'll Configure
- Organization Name - This will appear throughout the platform and in reports
- File Upload Limits - Set maximum file sizes for attachments and documents
- Security Incident Email - Configure where security alerts are sent
- Session timeout and other security settings
3
Customize Your Branding
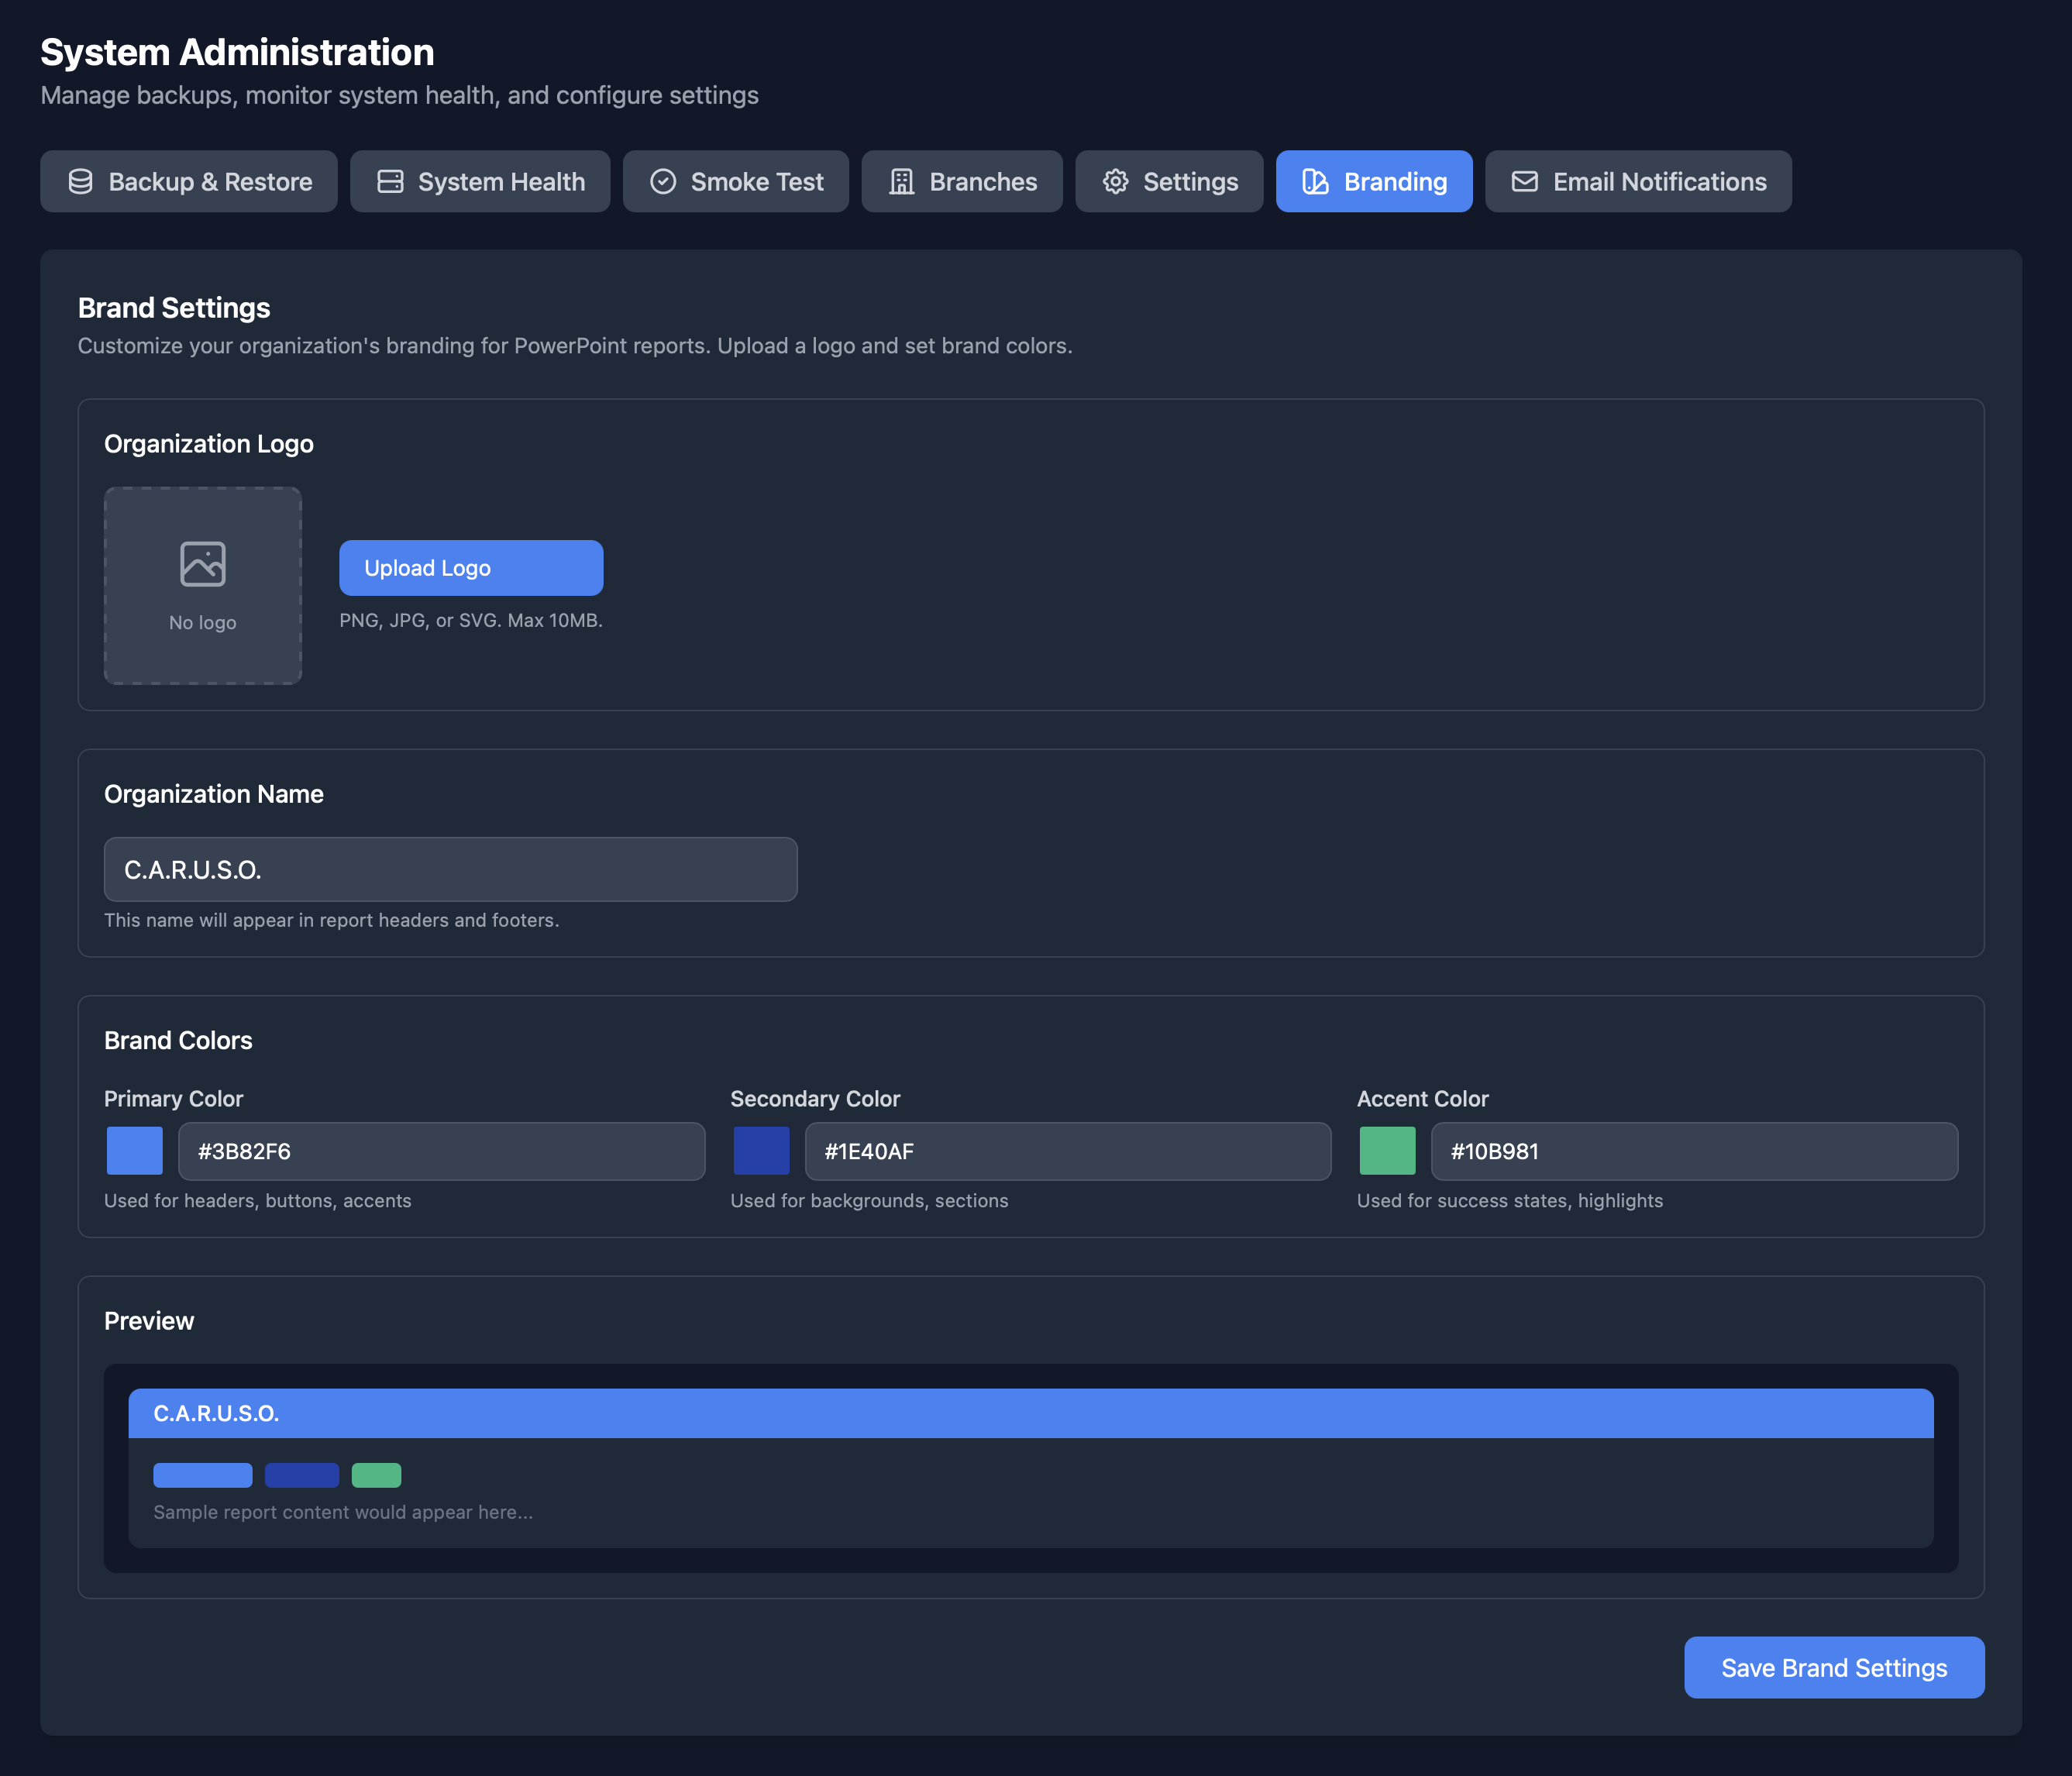
System Admin → Branding
Upload your company logo and customize the platform appearance to match your organization's identity.
What You'll Configure
- Upload your organization's logo (recommended: PNG or SVG, 200x200px minimum)
- Set your organization name for display throughout the platform
- Your logo will appear on the login screen, navigation, and reports
- Branding helps users identify your instance of the platform
4
Set Up Email Notifications
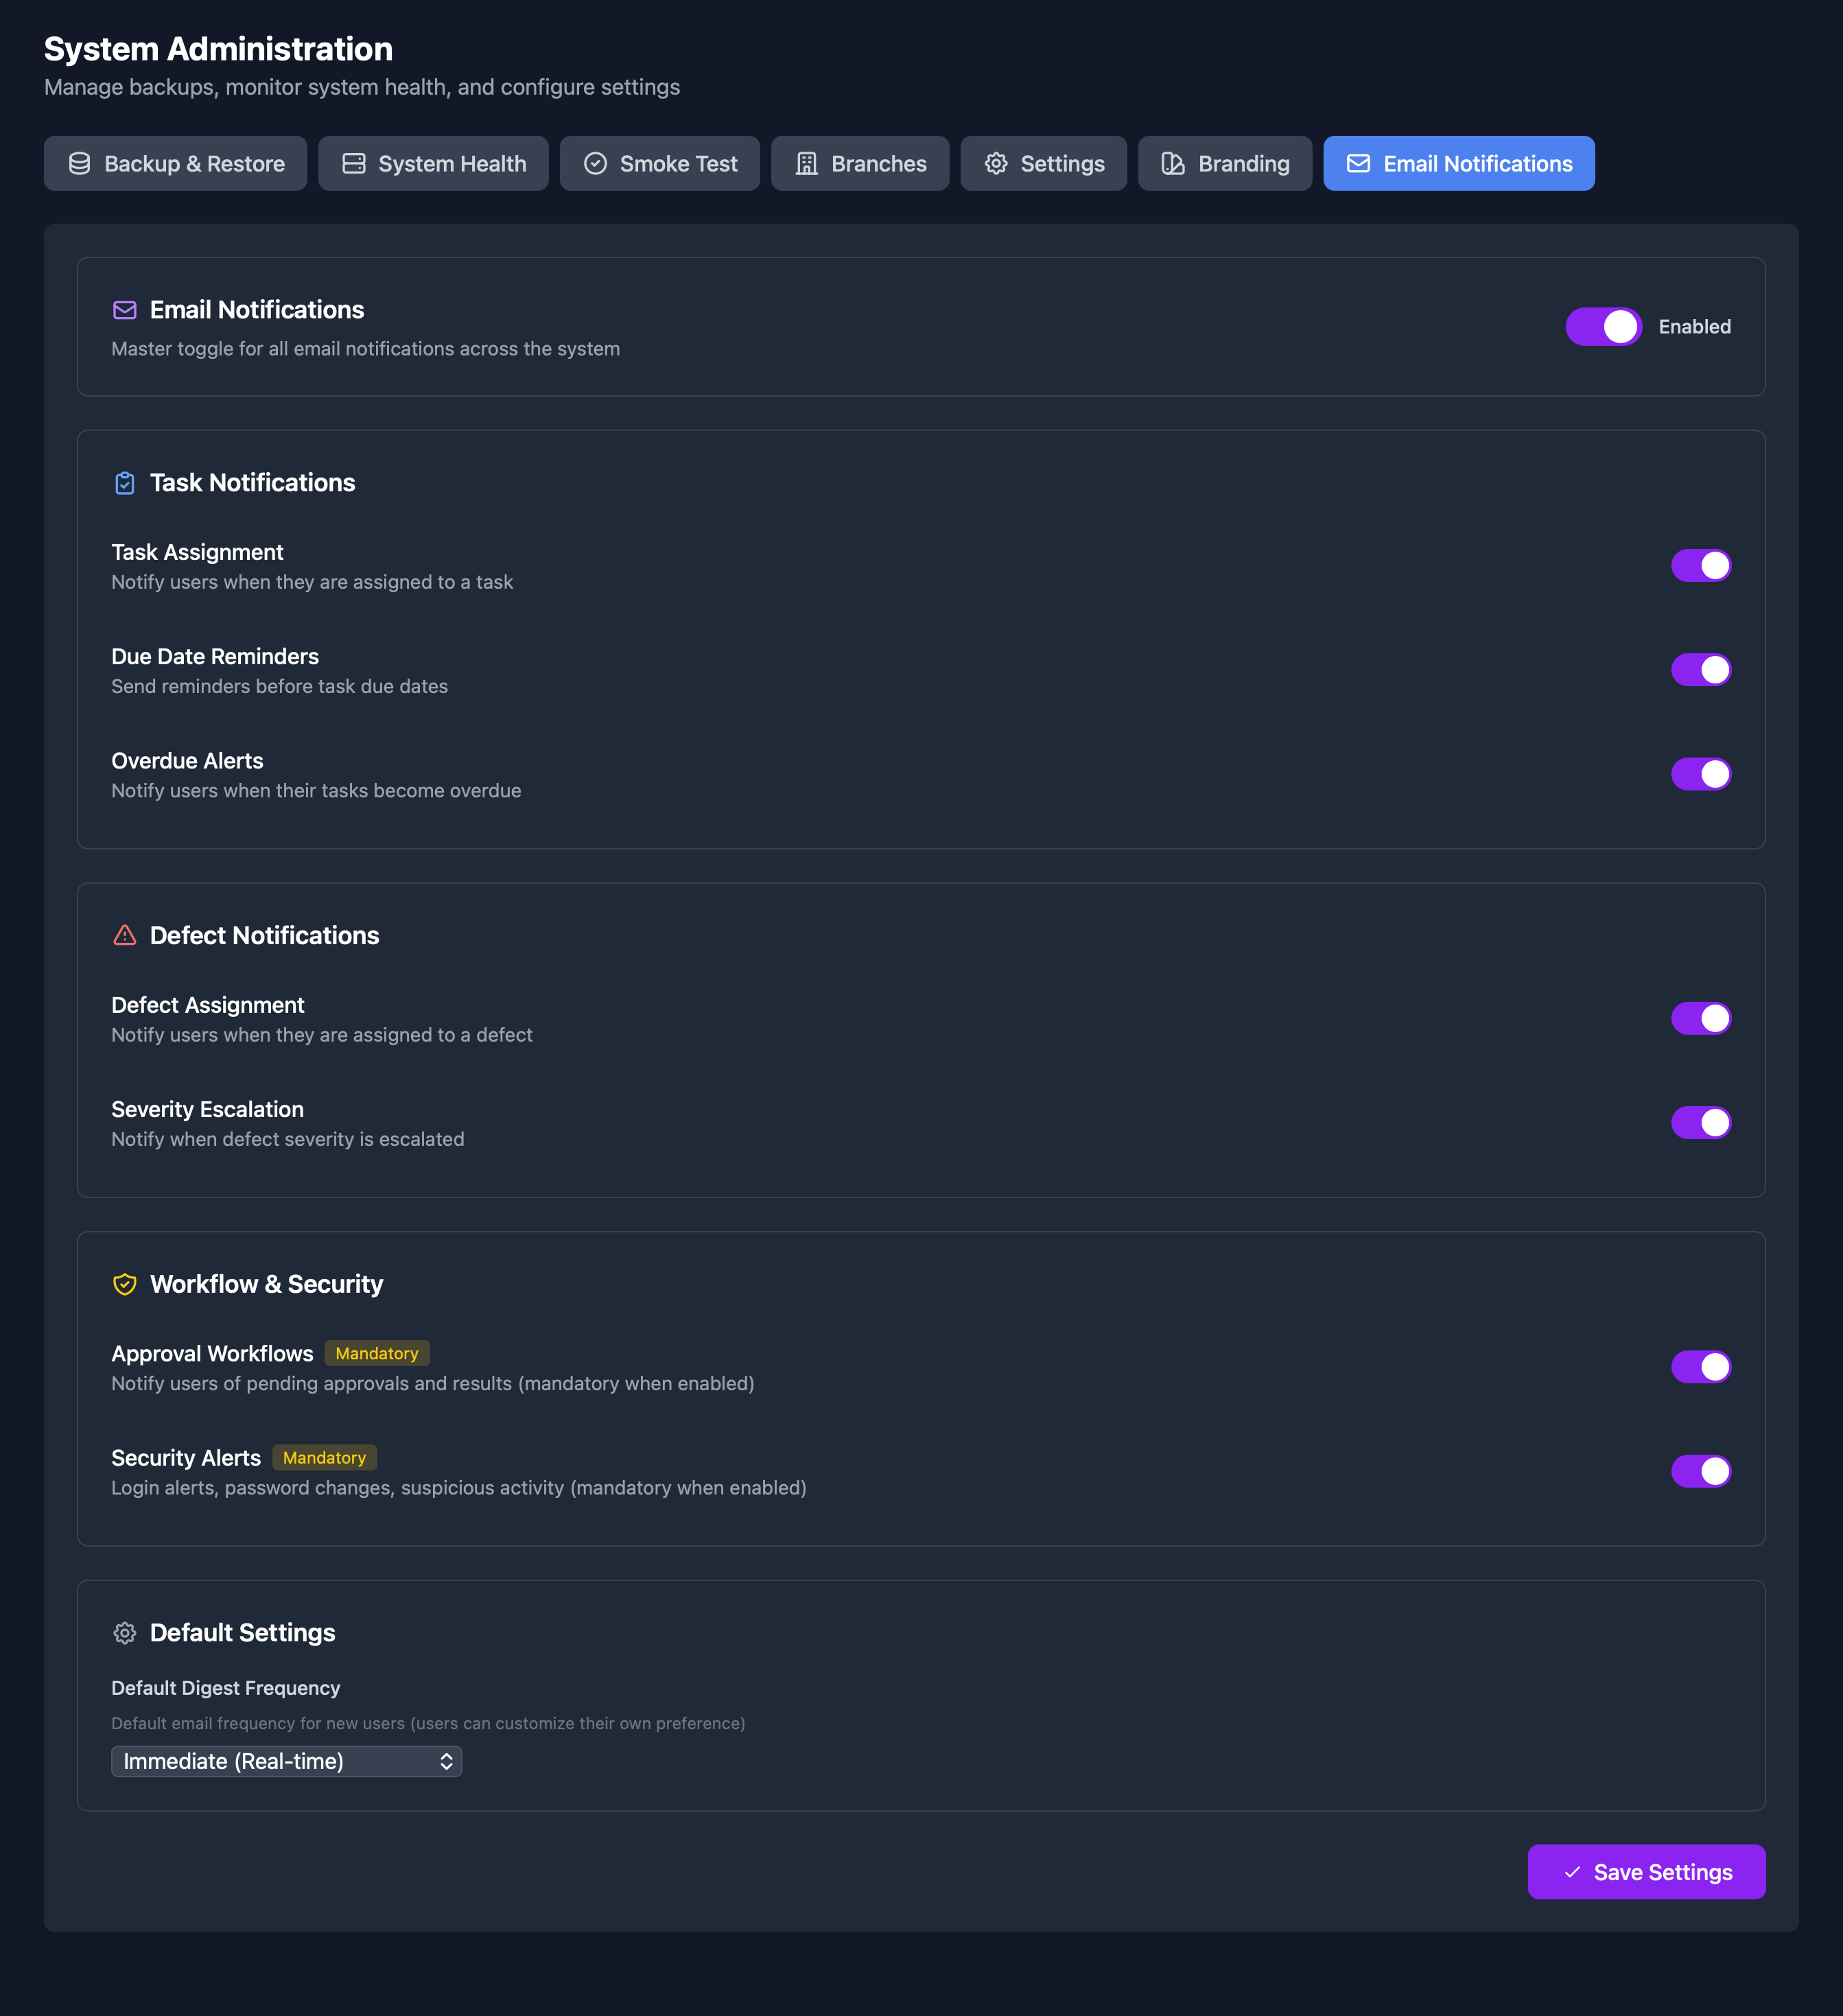
System Admin → Email Notifications
Configure how and when users receive email notifications about important events.
What You'll Configure
- Enable/disable email notifications globally
- Configure notification types (task assignments, due dates, comments, etc.)
- Set up digest emails for daily or weekly summaries
- Users can also customize their own notification preferences
5
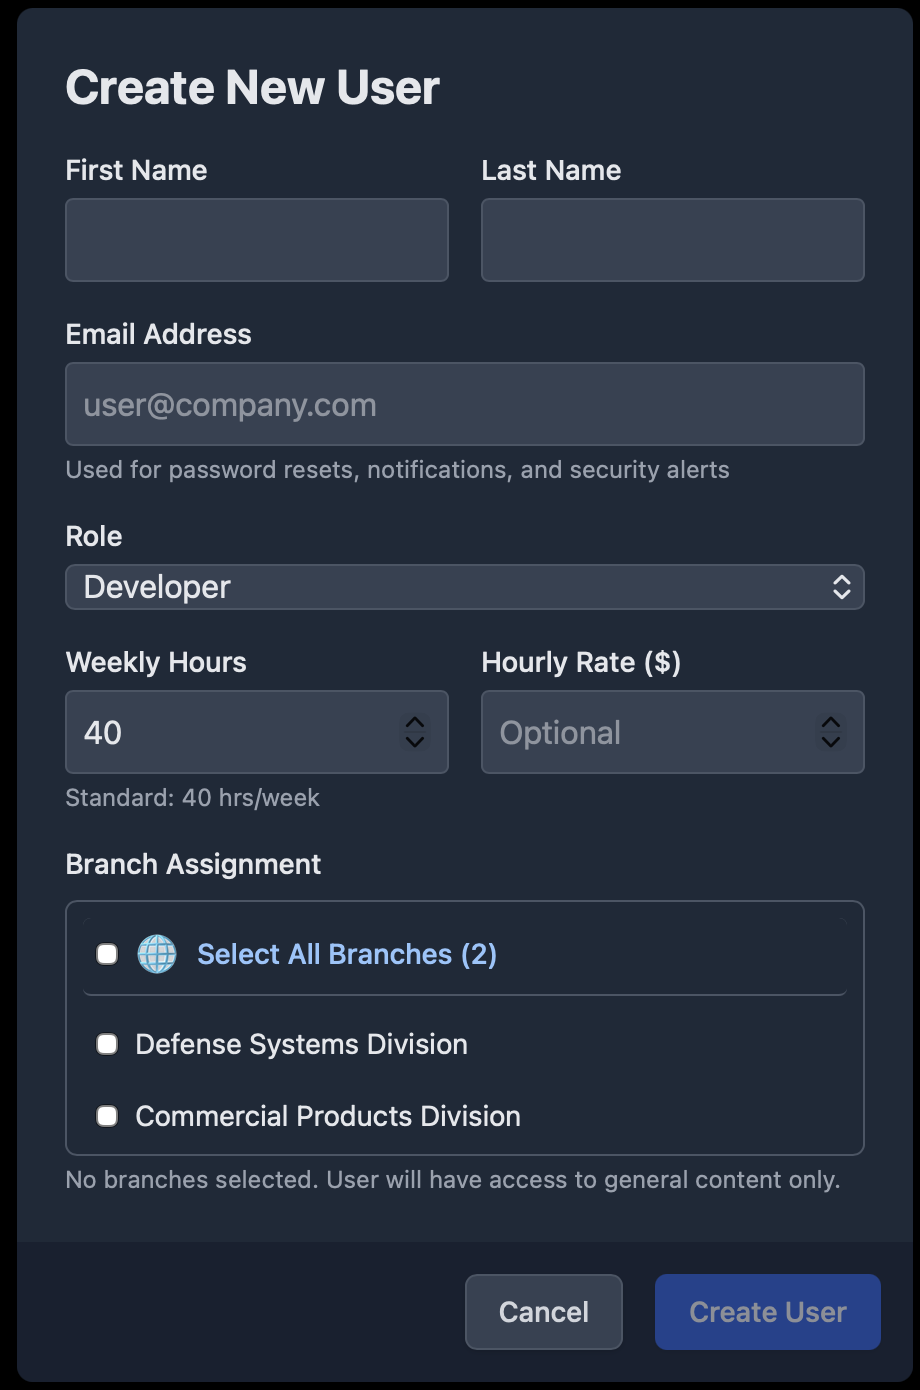
Create User Accounts
System Admin → User Management
Add users to your organization and assign them appropriate roles and permissions.
What You'll Configure
- Click "Add User" to create new accounts
- Enter user details: name, email, and initial password
- Assign a role (Admin, Project Manager, QA Manager, Developer, etc.)
- Assign users to specific branches and programs
- Users will receive an email to set up their account
You're All Set! 🎉
Once you've completed these steps, your team can start using CARUSO to manage projects, track quality assurance, and collaborate effectively.